最近外務比較多,文章耽擱了一陣子… 在繼續寫 microservices 系列文章前,我先補一篇最近跟 windows container network 奮鬥的紀錄吧,踩過的地雷跟掃雷的經驗,就分享給有同樣困擾的朋友們…

對,我的感受就像 Frodo 在山洞碰到蜘蛛一樣… 被 network 困住了… T_T
Windows Server 2016 在去年 2016/10 上市以來,windows container 跟 windows nano server 就一直 是新版本最大的亮點,不過 windows container 的完成度跟即將要滿四歲的 docker 比起來,仍然稍嫌不足。 單機版本的 windows container 其實已經夠用了,不過規模再擴大一點,需要動用到 docker swarm 的叢集, 就因為 container network 尚未支援 overlay network, 到現在還無法成功建立。不過我相信這功能應該快要 落地了,因為雲端版本的 Azure Container Services (private preview) 已經支援同時管理 windows / linux nodes 的 docker swarm, 已經有申請到 preview 資格的朋友們可以先嘗鮮看看 (Orz, 我的申請一直沒有通過 T_T)..
連帶的,windows container 的 container networking, 還有些地方實作沒那麼完整,我在實作 docker-compose 的過程中也碰到不少障礙,這篇就記錄一下跟他奮鬥的過程吧!
Overview: Windows Container networking
首先,貼一下官方的說明,這篇必看: Container Networking
這篇有寫的東西就不用再跟他奮鬥了,官方說法一定是第一優先參考的來源… 建議大家開始之前可以先花點時間看看這篇,能省掉不少冤枉路。我把幾個容易掉進去的點補充一下。
我這篇文章用的環境都是實體 server (非 VM) 上面安裝的 windows server 2016 standard edition, 相關版本如下:
C:\containers>ver

Microsoft Windows [Version 10.0.14393]

C:\containers>docker version
Client:
 Version:      1.12.2-cs2-ws-beta
 API version:  1.25
 Go version:   go1.7.1
 Git commit:   050b611
 Built:        Tue Oct 11 02:35:40 2016
 OS/Arch:      windows/amd64

Server:
 Version:      1.12.2-cs2-ws-beta
 API version:  1.25
 Go version:   go1.7.1
 Git commit:   050b611
 Built:        Tue Oct 11 02:35:40 2016
 OS/Arch:      windows/amd64

C:\containers>docker-compose version
docker-compose version 1.10.0-rc1, build ecff6f1a
docker-py version: 2.0.0
CPython version: 2.7.13
OpenSSL version: OpenSSL 1.0.2j  26 Sep 2016

C:\containers>
1. container port mapping 無法在本機 (container host) 使用
參考文章的這段:
Container endpoints are only reachable from the container host using container internal IPs and ports (find this info using ‘docker network inspect ‘).
沒錯,簡單的說,就是 windows container 採用的 NAT 是透過 WinNAT 提供的。而 WinNAT 並不支援 NAT loopback.
如果你建立了一個 container, 並且把他的 port 80 對應到 host 的 port 8000, 你可能會預期在 host (本機) 的瀏覽器,用
http://localhost:8000/ 就能夠存取 container 內的服務,結果卻不行,講的就是這個問題。
上述的動作就是 NAT loopback 的能力。你只能在本機以外的電腦,才能用 http://[本機對外IP]:8000 這網址存取到
container 的服務。如果你真的要在本機測試,那就有點麻煩了。你必須先用 docker inspect 查出這個 container 拿到的
IP address, 然後才能用 http://{container ip address}:80/ 存取該服務。記得 IP 要換成 container internal IP, 同時
port 也要是 container 原始定義的 port (此例是 tcp:80), 不是被 mapping 過的 port (此例 tcp:8000)。
我實際舉個例子:
STEP 1. 建立 IIS container
輸入指令 & 結果
C:\containers>docker run -d --name demo-iis -p 8000:80 microsoft/iis
583399b61a5cfd7efbe8666f519f0d258931f877118aef0b298aeaa078aea303

C:\containers>docker ps -a
CONTAINER ID        IMAGE               COMMAND                   CREATED             STATUS              PORTS                  NAMES
583399b61a5c        microsoft/iis       "C:\\ServiceMonitor..."   27 seconds ago      Up 23 seconds       0.0.0.0:8000->80/tcp   demo-iis

C:\containers>
STEP 2. 本機測試 http://localhost:8000
 結果果然是連不上..
STEP 3. 遠端測試 http://{container host ip}:8000
 換到我的工作機,用 server ip + port 來測試就可以了!
這邊補充一下,官方說法有提到這段:
Beginning in WS2016 TP5 and Windows Insider Builds greater than 14300, a firewall rule will be automatically created for all NAT port mappings. This firewall rule will be global to the container host and not localized to a specific container endpoint or network adapter.
如果你用的是 build 14300 以後的版本,透過 port mapping 對應的 container ports, 不用額外的去 firewall 建立新的 rule 來開放對外存取了。 這件事 windows container 會替你代勞…
STEP 4. 本機測試 http://{container ip}:80
要查詢 container 的 ip address, 可以用這指令:
C:\containers>docker inspect -f "{{.NetworkSettings.Networks.nat.IPAddress }}" demo-iis
192.168.14.216

C:\containers>
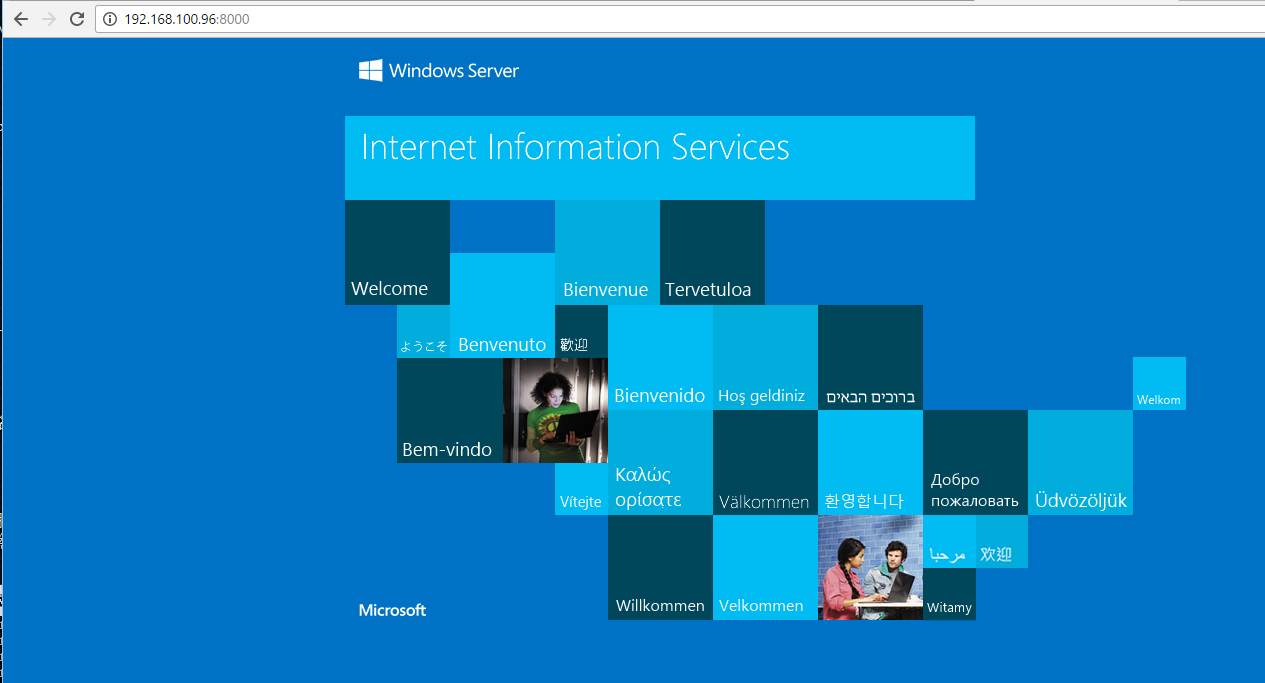
查到 ip address 是 192.168.14.216, 接著用 server 的 IE 來試試:
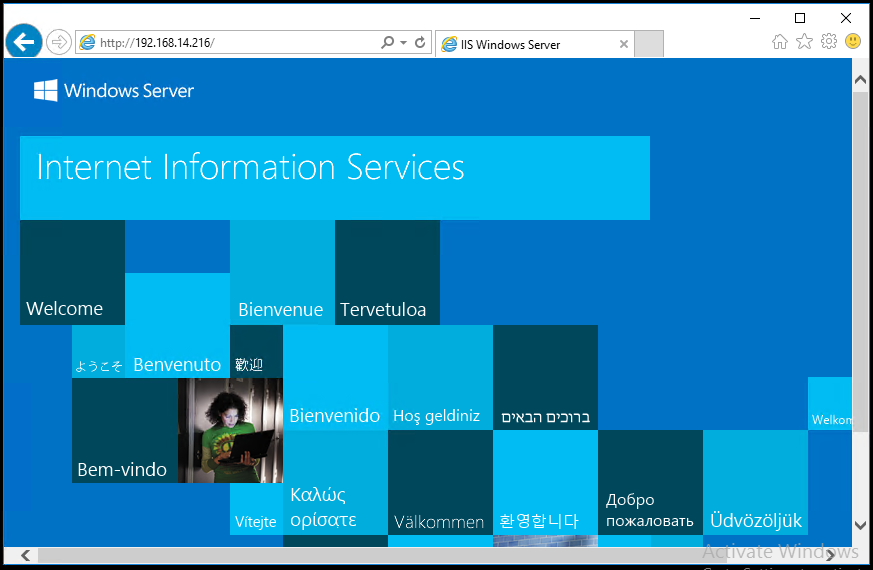
果然這樣就正常了! 所以官方文件一定要看啊,我仗著之前就熟 docker (linux 版本),不看完文件就開始動手,光是這邊 當時就浪費了我一個小時… @@
2. container link 官方宣稱不再支援
官方手冊這樣寫著:
Unsupported features

The following networking features are not supported today through Docker CLI

default overlay network driver
container linking (e.g. --link)
這又是一個坑啊,又是一個不乖乖看文件的教訓… 不支援也沒有訊息就算了,更 X 的是還支援一半… 哈哈,真是整個 栽進去了。以下是我的踩雷過程:
STEP 1. 跟剛才一樣,我先按照正常程序啟動一個跑 IIS 服務的 container, 只是這次不指定 port mapping 了:
C:\containers>docker run -d --name demo-iis microsoft/iis
6859e59146ea527b9c8cce4f985ce5634defd15671c34211297118b6d067cf39

C:\containers>
如果前面的例子你有照做,記得先刪掉之前的 container 啊…
STEP 2. 接著我再啟動第二個 container, 用 –link 連結到 STEP 1 建立的 container, 執行 cmd.exe 進入終端機模式:
C:\containers>docker run -t -i --rm --link demo-iis microsoft/windowsservercore cmd.exe
進入 container 的 shell:
Microsoft Windows [Version 10.0.14393]
(c) 2016 Microsoft Corporation. All rights reserved.

C:\>nslookup demo-iis
Server:  UnKnown
Address:  192.168.0.1

Non-authoritative answer:
Name:    demo-iis
Address:  192.168.5.164


C:\>ping demo-iis

Pinging demo-iis [192.168.5.164] with 32 bytes of data:
Reply from 192.168.5.164: bytes=32 time<1ms TTL=128
Reply from 192.168.5.164: bytes=32 time<1ms TTL=128
Reply from 192.168.5.164: bytes=32 time<1ms TTL=128
Reply from 192.168.5.164: bytes=32 time<1ms TTL=128

Ping statistics for 192.168.5.164:
    Packets: Sent = 4, Received = 4, Lost = 0 (0% loss),
Approximate round trip times in milli-seconds:
    Minimum = 0ms, Maximum = 0ms, Average = 0ms

C:\>exit

C:\containers>
看來是支援的啊!! 我可以在臨時建立的 container 內,靠 DNS 查的到 demo-iis 這個 host, 也 ping 的到他。 那我說支援一半是指什麼? 請看下一步…
STEP 3. 先前我漏掉 –link, 結果變成這樣:
C:\containers>docker run -t -i --rm microsoft/windowsservercore cmd.exe

(進入 container 的 shell)

Microsoft Windows [Version 10.0.14393]
(c) 2016 Microsoft Corporation. All rights reserved.

C:\>nslookup demo-iis
Server:  UnKnown
Address:  192.168.0.1

Non-authoritative answer:
Name:    demo-iis
Address:  192.168.5.164


C:\>ping demo-iis
Ping request could not find host demo-iis. Please check the name and try again.

C:\>exit

C:\containers>
實在很 OOXX,不支援沒關係啊,DNS 還給我查的到幹嘛 @@ 看來 –link 的實作並沒有處理 DNS 的部分,大概只在 firewall 的層級處理這兩個 container 的流量而已。
這又只能怪自己不認真看文件… 哈哈。不過這測試也點出一個重點,就是 container 之間的 discovery 可以靠 windows container engine 幫我們處理好 DNS (用 container name 當作 host name), 方便 container 之間 的通訊。
3. docker-compose 的 service discovery 無效問題
這是另一個地雷,我先把我卡住的步驟列給大家看一下。docker-compose 很好用,尤其是他的 scale 設定更是一絕。 所以我就弄了 nginx (win32 版), asp.net webapp (scale x 2), 外加一個 console. 花了點心思設定好 nginx 當作前端,替後端兩個 asp.net webapp 做 load balance.
我把我的操作步驟列一下:
STEP 1, 準備 nginx.config
我就準備了個 nginx.config, 把 80 port 的流量,引導到後端的 webapp 這個 container, 設定內容如下:
events {
  worker_connections  4096;  ## Default: 1024
}

http {
    upstream production {
        server webapp;
    }

    server {
        listen 80;

        location / {
            proxy_pass http://production/;
        }
    }
}
STEP 2, 準備 dockerfile, build proxy container
同時我準備了個簡單的 dockerfile (為了某些問題,我把 CMD 寫在外面):
FROM microsoft/windowsservercore
COPY nginx           /nginx
COPY start-nginx.cmd /
STEP 3, 準備 docker-compose.yml 定義整組 application
整個 application 的 docker-compose.yml 長這樣:
version: '2.1'
services:
  webapp:
    image: andrew0928/mvcdemo:1.0
    volumes:
      - c:\containers\data:c:\inetpub\wwwroot\app_data
    ports:
      - 80

  proxy:
    build: ./mvcproxy
    command: start-nginx.cmd
    depends_on:
      - webapp
    ports:
      - 80:80

  console:
    image: microsoft/windowsservercore
    command: ping -t localhost
    depends_on:
      - webapp
      - proxy

networks:
  default:
    external:
      name: nat
STEP 4, 透過 docker-compose CLI 啟動 application
大功告成 (我以為),然後當然就啟動這個 application 了:
C:\containers>docker-compose up -d --build
Building proxy
Step 1/4 : FROM microsoft/windowsservercore
 ---> f49a4ea104f1
Step 2/4 : COPY nginx /nginx
 ---> Using cache
 ---> 4dcf4fd5abce
Step 3/4 : COPY start-nginx.cmd /
 ---> Using cache
 ---> 9b1c481c8ef9
Step 4/4 : COPY reload.cmd /
 ---> Using cache
 ---> 7700608af597
Successfully built 7700608af597
containers_webapp_1 is up-to-date
containers_proxy_1 is up-to-date
containers_console_1 is up-to-date

C:\containers>
STEP 5, Trouble shooting: container networking 狀況時好時壞
結果,NGINX 就是時好時壞的,有時一切正常,有時就跟我回報查不到 webapp, 無法啟動… 如果我把啟動 NGINX 的指令寫在 CMD ,那就更難追了,因為啟動失敗 container 就自動停掉了… 這也是後來我把 CMD 拿掉, 改成在 docker-compose.yml 裡面指定的原因,方便除錯。
我驗證的方式是啟動後,我再用 docker exec 的方式,在 console 這個 container 多開個 cmd.exe 當 shell 連進去測試網路:
連進去的指令: docker exec -i -t containers_console_1 cmd.exe
測試的指令與結果:
C:\>nslookup webapp
Server:  UnKnown
Address:  172.31.208.1

Non-authoritative answer:
Name:    webapp
Address:  172.31.213.79


C:\>ping webapp
Ping request could not find host webapp. Please check the name and try again.

C:\>ping 172.31.213.79

Pinging 172.31.213.79 with 32 bytes of data:
Reply from 172.31.213.79: bytes=32 time<1ms TTL=128
Reply from 172.31.213.79: bytes=32 time<1ms TTL=128
Reply from 172.31.213.79: bytes=32 time<1ms TTL=128
Reply from 172.31.213.79: bytes=32 time<1ms TTL=128

Ping statistics for 172.31.213.79:
    Packets: Sent = 4, Received = 4, Lost = 0 (0% loss),
Approximate round trip times in milli-seconds:
    Minimum = 0ms, Maximum = 0ms, Average = 0ms

C:\>
真是見鬼了.. DNS 查的到 IP,但是 PING hostname 沒結果,PING IP 就沒問題?????
我就是被這問題搞了半天… 最後靈光一閃,補了這個指令:
C:\>ipconfig /displaydns

Windows IP Configuration

    _ldap._tcp.dc._msdcs.workgroup
    ----------------------------------------
    Name does not exist.


    webapp
    ----------------------------------------
    Name does not exist.


    wpad
    ----------------------------------------
    Name does not exist.


C:\>
真是 OOXX … webapp 這筆紀錄何時跑到 cache 內的? 而且還是查不到 IP 的紀錄, 沒有 TTL 當然也是
一輩子不會更新了,難怪 PING 指令查不到,他根本沒去 DNS 查啊,只是去 cache 裡找而已。
有想法後就容易多了,我多下了道指令,清除 DNS cache 後再試一次:
C:\>ipconfig /flushdns & ping webapp

Windows IP Configuration

Successfully flushed the DNS Resolver Cache.
Ping request could not find host webapp. Please check the name and try again.

C:\>ipconfig /flushdns & ping webapp

Windows IP Configuration

Successfully flushed the DNS Resolver Cache.
Ping request could not find host webapp. Please check the name and try again.

C:\>ipconfig /flushdns & ping webapp

Windows IP Configuration

Successfully flushed the DNS Resolver Cache.

Pinging webapp [172.31.213.79] with 32 bytes of data:
Reply from 172.31.213.79: bytes=32 time<1ms TTL=128
Reply from 172.31.213.79: bytes=32 time<1ms TTL=128
Reply from 172.31.213.79: bytes=32 time<1ms TTL=128
Reply from 172.31.213.79: bytes=32 time<1ms TTL=128

Ping statistics for 172.31.213.79:
    Packets: Sent = 4, Received = 4, Lost = 0 (0% loss),
Approximate round trip times in milli-seconds:
    Minimum = 0ms, Maximum = 0ms, Average = 0ms

C:\>
結果挺頑強的,cache 清除一次還不夠,我試了好幾次 (手打的,不是寫 script),每次指令大概都間隔十來秒。 這種不確定性實在很討人厭啊… 我總不能每次啟動 application 都這樣試半天吧? 哪天服務重新啟動沒跑起來, 我不就要被半夜 call 起床處理了嗎? @@
不過,往好處想,至少抓到原因了,第一筆沒紀錄的 cache 應該是 container 啟動時 DNS 還沒完全 更新好,這筆紀錄就寫進 cache 了… 不過後來 refreshdns 好幾次都沒用,我就不解了。只能把他理解為 container 外面可能還有一層更頑強的 cache 在作怪吧…
STEP 6, 啟動 scripts, 等待 DNS
於是 NGINX 的啟動階段,我就不寫在 CMD 內了,我另外寫了個 script,來負責啟動 NGINX:
start-nginx.cmd
cd /d c:\nginx

:loop
ipconfig /flushdns
nginx.exe
powershell /c sleep 1
goto loop
其實沒做啥事,就是寫個 infinity loop, 清掉 dns cache, 試著啟動看看 nginx (如果 DNS 查不到 webapp, nginx 會失敗退出) 。失敗的話就 sleep 1 sec, 然後重來,直到成功為止。
加上這招,果然就萬無一失了,我測了好幾次都沒問題。平均 container 全部跑起來後,大概要等 30 ~ 60 sec 就能完全啟動。 光是這個 DNS 的問題,就搞了我大半天… 總算告一段落。
這樣就結束了嗎? 當然還沒… 我繼續用 docker-compose 的 scale 功能調整 webapp 的個數:
C:\containers\mvcproxy>docker-compose scale webapp=5
Creating and starting containers_webapp_2 ... done
Creating and starting containers_webapp_3 ... done
Creating and starting containers_webapp_4 ... done
Creating and starting containers_webapp_5 ... done

C:\containers\mvcproxy>
可是怎麼測都只會連到第一個 container, 我就知道我又中了 DNS 的招了…
繼續切到 console shell 驗證看看:
C:\>ipconfig /displaydns

Windows IP Configuration

    webapp
    ----------------------------------------
    Record Name . . . . . : webapp
    Record Type . . . . . : 1
    Time To Live  . . . . : 572
    Data Length . . . . . : 4
    Section . . . . . . . : Answer
    A (Host) Record . . . : 172.31.213.79


C:\>nslookup webapp
Server:  UnKnown
Address:  172.31.208.1

Non-authoritative answer:
Name:    webapp
Addresses:  172.31.213.79
          172.31.215.152
          172.31.218.73
          172.31.216.60
          172.31.217.253


C:\>
果然! DNS cache 裡 webapp 只有一個 IP,但是 DNS 已經查的到 5 筆了。清掉 cache 再來一次果然就 OK 了:
C:\>ipconfig /flushdns

Windows IP Configuration

Successfully flushed the DNS Resolver Cache.


C:\>ping webapp

Pinging webapp [172.31.216.60] with 32 bytes of data:
Reply from 172.31.216.60: bytes=32 time<1ms TTL=128
Reply from 172.31.216.60: bytes=32 time<1ms TTL=128
Reply from 172.31.216.60: bytes=32 time<1ms TTL=128
Reply from 172.31.216.60: bytes=32 time<1ms TTL=128

Ping statistics for 172.31.216.60:
    Packets: Sent = 4, Received = 4, Lost = 0 (0% loss),
Approximate round trip times in milli-seconds:
    Minimum = 0ms, Maximum = 0ms, Average = 0ms

C:\>ipconfig /displaydns

Windows IP Configuration

    webapp
    ----------------------------------------
    Record Name . . . . . : webapp
    Record Type . . . . . : 1
    Time To Live  . . . . : 585
    Data Length . . . . . : 4
    Section . . . . . . . : Answer
    A (Host) Record . . . : 172.31.216.60


    Record Name . . . . . : webapp
    Record Type . . . . . : 1
    Time To Live  . . . . : 585
    Data Length . . . . . : 4
    Section . . . . . . . : Answer
    A (Host) Record . . . : 172.31.217.253


    Record Name . . . . . : webapp
    Record Type . . . . . : 1
    Time To Live  . . . . : 585
    Data Length . . . . . : 4
    Section . . . . . . . : Answer
    A (Host) Record . . . : 172.31.218.73


    Record Name . . . . . : webapp
    Record Type . . . . . : 1
    Time To Live  . . . . : 585
    Data Length . . . . . : 4
    Section . . . . . . . : Answer
    A (Host) Record . . . : 172.31.215.152


    Record Name . . . . . : webapp
    Record Type . . . . . : 1
    Time To Live  . . . . : 585
    Data Length . . . . . : 4
    Section . . . . . . . : Answer
    A (Host) Record . . . : 172.31.213.79
可是,NGINX 那邊怎麼辦啊?
我查了 NGINX,其實他有一些設定,可以讓你跳過 DNS cache, 讓 NGINX 自己控制這些問題:
NGINX: resolver
By default, nginx caches answers using the TTL value of a response. An optional valid parameter allows overriding it:
resolver 127.0.0.1 [::1]:5353 valid=30s;
不過很可惜的是,這指令我一直視不出來 @@,找到的範例大多是 Linux 的,這年頭誰會開個 windows server 跑 NGINX 啊.. 我決定不在跟他奮鬥了,將來真的要正式佈署的話,交給熟悉 NGINX 的人來搞定他會實際得多.. 我先想辦法繞過去。
STEP 7, 網路組態改變時的更新 scripts
於是我補了第二個批次檔,用來更新 NGINX:
reload.cmd
cd /d c:\nginx
ipconfig /flushdns
nginx -s reload
我只要記得每次用 docker-compose 調整 scale 後,或是任何 NGINX 已經啟動的情況下,還要重新載入 DNS 設定的話, 就跑這段就好:
C:\containers>docker exec containers_proxy_1 reload.cmd

C:\>cd /d c:\nginx

c:\nginx>ipconfig /flushdns

Windows IP Configuration

Successfully flushed the DNS Resolver Cache.

c:\nginx>nginx -s reload
nginx: [emerg] host not found in upstream "webapp" in c:\nginx/conf/nginx.conf:7

C:\containers>docker exec containers_proxy_1 reload.cmd

C:\>cd /d c:\nginx

c:\nginx>ipconfig /flushdns

Windows IP Configuration

Successfully flushed the DNS Resolver Cache.

c:\nginx>nginx -s reload
nginx: [emerg] host not found in upstream "webapp" in c:\nginx/conf/nginx.conf:7

C:\containers>docker exec containers_proxy_1 reload.cmd

C:\>cd /d c:\nginx

c:\nginx>ipconfig /flushdns

Windows IP Configuration

Successfully flushed the DNS Resolver Cache.

c:\nginx>nginx -s reload
nginx: [emerg] host not found in upstream "webapp" in c:\nginx/conf/nginx.conf:7

C:\containers>docker exec containers_proxy_1 reload.cmd

C:\>cd /d c:\nginx

c:\nginx>ipconfig /flushdns

Windows IP Configuration

Successfully flushed the DNS Resolver Cache.

c:\nginx>nginx -s reload

C:\containers>
XXX !!! 又是這種鳥問題… 一次跑不成功,那你有試過跑兩次嗎? 當然有,我跑了十次才成功…
最後我決定到這邊先告一段落了。因為看起來問題的源頭都在 DNS cache 問題,同樣的組態在 linux 的 docker 就跑得很順利… 看來這也是 Microsoft 至今還未 release 進階功能的原因之一吧 (例如 docker swarm 支援)。
官網那篇文章,也還列了一些尚未完成的網路功能:
 The following network options are not supported on Windows Docker at this time:+

 --add-host
 --dns-opt
 --dns-search
 --aux-address
 --internal
 --ip-range
再加上我自己踩到的雷… 除非現在我有非用不可的理由,不然先了解狀況,記下 & 回報這些 issues,暫時先避開, 等 Microsoft 解決後再來使用是比較理智的做法 XD
4. Windows 10 升級 Creator Update (1704) 後, container network 就無法連線了
2017/06/23 補
其實這個問題已經發生一個月了,只是之前我一直以為是我手殘,愛自己亂搞設定才會這樣,直到有網友也問了我同樣問題.. XD
症狀是這樣,首先,原本的 container 啟動時,用預設的 docker network: nat 都是一切正常的,container 本身可以上網,透過 port mapping 也可以正常地被外界存取。真正搞掛它的原因其實我也不大確定 (發現時已經掛了)。我印象中,中間按照順序,曾做了這幾件可能搞掛它的事情:
- 手動刪除並重建 docker network: nat (不過我已經找不到當初怎麼重建了 T_T)
- 升級 windows 10 creator update (1704) 更新 (重點提示: 這版開始支援 multiple nat network, overlay network)
- 安裝 docker for windows (原本是按照 microsoft 官方文件手動安裝的), 同時加進 windows / linux container, 支援切換
- 手動調整 hyper-v virtual network switch
總之問題就這麼發生了,等到某天我心血來潮想要 build 我自己的 container 時,發現怎樣都不 work (就是那篇 IP2C 自動下載 database 的那個),才發現原來我的 container network 是壞的 …
附上我檢測的程序:
STEP 1. 測試 container 對外的連線
首先,直接開啟一個新的 windows server core container, 用互動模式,在裡面 run cmd.exe :
docker run --rm -t -i microsoft/windowsservercore cmd.exe
啟動之後, 就進行網路的基本偵錯: ping google dns server (8.8.8.8) 看看:
Microsoft Windows [Version 10.0.14393]
(c) 2016 Microsoft Corporation. All rights reserved.

C:\>ping 8.8.8.8

Pinging 8.8.8.8 with 32 bytes of data:
Reply from 172.17.30.45: Destination host unreachable.
Request timed out.
Request timed out.
Reply from 172.17.30.45: Destination host unreachable.

Ping statistics for 8.8.8.8:
    Packets: Sent = 4, Received = 2, Lost = 2 (50% loss),

C:\>
果然真的掛了… 印一下 ipconfig /all 看看 TCP/IP 設定:
C:\>ipconfig /all

Windows IP Configuration

   Host Name . . . . . . . . . . . . : 4e6517d77b80
   Primary Dns Suffix  . . . . . . . :
   Node Type . . . . . . . . . . . . : Hybrid
   IP Routing Enabled. . . . . . . . : No
   WINS Proxy Enabled. . . . . . . . : No

Ethernet adapter Ethernet 2:

   Connection-specific DNS Suffix  . :
   Description . . . . . . . . . . . : Microsoft Hyper-V Network Adapter #2
   Physical Address. . . . . . . . . : 00-15-5D-A3-13-69
   DHCP Enabled. . . . . . . . . . . : Yes
   Autoconfiguration Enabled . . . . : Yes
   Link-local IPv6 Address . . . . . : fe80::cca8:635:b608:54c7%5(Preferred)
   IPv4 Address. . . . . . . . . . . : 172.17.30.45(Preferred)
   Subnet Mask . . . . . . . . . . . : 255.255.240.0
   Default Gateway . . . . . . . . . : 172.17.16.1
   DHCPv6 IAID . . . . . . . . . . . : 83891549
   DHCPv6 Client DUID. . . . . . . . : 00-01-00-01-20-DE-F2-BA-00-15-5D-A3-13-69
   DNS Servers . . . . . . . . . . . : 172.17.16.1
   NetBIOS over Tcpip. . . . . . . . : Disabled

C:\>
STEP 2, check docker host network
看起來沒啥問題啊,只好退出 container 的 cmd.exe, 回到 host 查看預設的 docker network: nat
C:\CodeWork\github.com\columns.chicken-house.net>docker network inspect nat
[
    {
        "Name": "nat",
        "Id": "539c4ea3ba2c1e7a7ed5b9946299f26606c37b3b845da5e4e200e04d873a8ff2",
        "Created": "2017-06-23T23:27:40.9278477+08:00",
        "Scope": "local",
        "Driver": "nat",
        "EnableIPv6": false,
        "IPAM": {
            "Driver": "windows",
            "Options": null,
            "Config": [
                {
                    "Subnet": "172.17.16.0/20",
                    "Gateway": "172.17.16.1"
                }
            ]
        },
        "Internal": false,
        "Attachable": false,
        "Containers": {},
        "Options": {
            "com.docker.network.windowsshim.hnsid": "7d334959-f003-4f36-95be-002fbe4174c2",
            "com.docker.network.windowsshim.networkname": "nat"
        },
        "Labels": {}
    }
]

C:\CodeWork\github.com\columns.chicken-house.net>
STEP 3, create new docker network
依舊看不出甚麼問題,明明就一切正常啊… 後來決定繞過預設的 nat (我一直以為是我前面的步驟,自己把網路搞掛了。反正也無從證明了…), 另外建立新的 docker network 測試看看…
順便補充一下,creator update 這版更新,windows container network 有兩個比較大的更新:
- support multiple nat network
- support overlay network (swarm mode)
Reference: Windows Container Network
這個版本由於正是支援 overlay network, 也因此這版的 windows container 也開始能支援 docker swarm 叢集的模式了。你可以用多台 docker host 建立 swarm mode, 串在一起使用。docker swarm 會在這些 hosts 之間建立一個 overlay network, 在這上面執行的 containers 就能透過網路互相看到其他的 containers.
另外,在過去的版本,NAT 只能有一個,現在這限制解除了。還好解除限制,因為這次我的解決方式就是建立另一個新的 nat network … 幾個指令我就一次貼完:
C:\CodeWork\github.com\columns.chicken-house.net>docker network create --help

Usage:  docker network create [OPTIONS] NETWORK

Create a network

Options:
      --attachable             Enable manual container attachment
      --aux-address map        Auxiliary IPv4 or IPv6 addresses used by Network driver (default map[])
  -d, --driver string          Driver to manage the Network (default "bridge")
      --gateway stringSlice    IPv4 or IPv6 Gateway for the master subnet
      --help                   Print usage
      --internal               Restrict external access to the network
      --ip-range stringSlice   Allocate container ip from a sub-range
      --ipam-driver string     IP Address Management Driver (default "default")
      --ipam-opt map           Set IPAM driver specific options (default map[])
      --ipv6                   Enable IPv6 networking
      --label list             Set metadata on a network (default [])
  -o, --opt map                Set driver specific options (default map[])
      --subnet stringSlice     Subnet in CIDR format that represents a network segment

C:\CodeWork\github.com\columns.chicken-house.net>docker network create -d nat andrew-nat
a0d391dc2a954d7e75c1a637367f45d02620dd7a676889e067f5e1684601a1fe

C:\CodeWork\github.com\columns.chicken-house.net>docker network inspect andrew-nat
[
    {
        "Name": "andrew-nat",
        "Id": "a0d391dc2a954d7e75c1a637367f45d02620dd7a676889e067f5e1684601a1fe",
        "Created": "2017-06-24T00:15:03.0927055+08:00",
        "Scope": "local",
        "Driver": "nat",
        "EnableIPv6": false,
        "IPAM": {
            "Driver": "windows",
            "Options": {},
            "Config": [
                {
                    "Subnet": "0.0.0.0/0",
                    "Gateway": "0.0.0.0"
                }
            ]
        },
        "Internal": false,
        "Attachable": false,
        "Containers": {},
        "Options": {
            "com.docker.network.windowsshim.hnsid": "e16beffe-a9be-44f6-aa61-668388db0c90"
        },
        "Labels": {}
    }
]

C:\CodeWork\github.com\columns.chicken-house.net>docker run --rm -t -i --network andrew-nat microsoft/windowsservercore cmd.exe
上面的動作做了幾件事:
- 查閱建立 network 的參數說明 (
docker network create --help) - 全部用預設參數,建立一個名為 “andrew-nat” 的 docker networ (
docker network create -d nat andrew-nat) - 用 docker network inspect 指令查詢 andrew-nat 的詳細設定
- 用同樣的方式,啟動一個新的 windows server core container, 掛上新的 andrew-nat network, 用互動模式執行 cmd.exe…
STEP 4, run container with specified docker network
結果實在是太過份了,這樣就一切正常… 害我浪費了半天的時間… T_T 貼一下測試的結果:
Microsoft Windows [Version 10.0.14393]
(c) 2016 Microsoft Corporation. All rights reserved.

C:\>ipconfig /all

Windows IP Configuration

   Host Name . . . . . . . . . . . . : 70aa2f664a0a
   Primary Dns Suffix  . . . . . . . :
   Node Type . . . . . . . . . . . . : Hybrid
   IP Routing Enabled. . . . . . . . : No
   WINS Proxy Enabled. . . . . . . . : No
   DNS Suffix Search List. . . . . . : chicken-house.net

Ethernet adapter Ethernet 2:

   Connection-specific DNS Suffix  . : chicken-house.net
   Description . . . . . . . . . . . : Microsoft Hyper-V Network Adapter #2
   Physical Address. . . . . . . . . : 00-15-5D-7B-82-58
   DHCP Enabled. . . . . . . . . . . : Yes
   Autoconfiguration Enabled . . . . : Yes
   Link-local IPv6 Address . . . . . : fe80::2404:56ca:bde:f4aa%5(Preferred)
   IPv4 Address. . . . . . . . . . . : 172.17.159.47(Preferred)
   Subnet Mask . . . . . . . . . . . : 255.255.240.0
   Default Gateway . . . . . . . . . : 172.17.144.1
   DHCPv6 IAID . . . . . . . . . . . : 83891549
   DHCPv6 Client DUID. . . . . . . . : 00-01-00-01-20-DE-F9-5E-00-15-5D-7B-82-58
   DNS Servers . . . . . . . . . . . : 172.17.144.1
                                       192.168.100.1
   NetBIOS over Tcpip. . . . . . . . : Disabled

C:\>ping 8.8.8.8

Pinging 8.8.8.8 with 32 bytes of data:
Reply from 8.8.8.8: bytes=32 time=9ms TTL=45
Reply from 8.8.8.8: bytes=32 time=8ms TTL=45
Reply from 8.8.8.8: bytes=32 time=8ms TTL=45
Reply from 8.8.8.8: bytes=32 time=8ms TTL=45

Ping statistics for 8.8.8.8:
    Packets: Sent = 4, Received = 4, Lost = 0 (0% loss),
Approximate round trip times in milli-seconds:
    Minimum = 8ms, Maximum = 9ms, Average = 8ms

C:\>
老實說網路設定也看不出來有哪裡不一樣啊,但是就是很神奇,新的會跑舊的不會跑… 我只好暫時把它當作懸案處理, 除了每次 docker run 都要 多打一段 –network andrew-nat 參數之外,其他沒啥不一樣! 就先這樣, case closed.
後記
這些我相信有深入一點使用 windows container 的人,應該多少都有碰到吧! 這麼重要的功能,我其實不大擔心, Microsoft 一定會解決的 (不然 windows container 就沒人敢用了),接下來你只要等就可以了 XDD
我還是對 windows container 很有信心的,因為只有靠他才能讓我既有的 asp.net application 全部都容器化啊! 相較於移植到 .net core, 我想還是等 windows container 實際得多 :D
這篇文章記錄的都是 2017/01/15 之前的狀態,如果各位是在幾個月後才看到這篇文章,記得先確認一下問題是否還存 在啊! 如果已經解決了,也歡迎在底下留下 comments 通知一下,造福大家~